The radiator started up with its usual metallic ticking sound that normally meant warmth was coming. Outside the wind moved through empty branches & shook the window frames like a quiet signal that colder weather was ahead. Inside the air was warm enough but it felt thin and dry. Your throat felt scratchy & your skin felt tight on your hands while your nose seemed ready to sneeze at any moment. Then you remembered something you heard before from maybe an older family member or somewhere online about putting a glass of water near the radiator to make the room feel better. You look toward the kitchen and think about how strange it seems that an ordinary glass of water could actually help with the dryness. It sounds like some kind of old myth or superstition. But as the evening goes on and the air gets even drier you fill a glass completely & carry it back to set it down next to the radiator. As the water slowly heats up something small begins to change. It happens in a quiet way that you can barely notice at first but winter always reveals its secrets like this.
The Hidden Science in a Glass of Water
At first, the idea that a simple glass of water can make a room feel warmer without raising your energy bill seems almost magical. Water doesn’t generate heat like a tiny heater on your windowsill. The truth is subtler. It’s not about adding warmth but about helping your body experience existing heat more effectively.

Why Dry Air Makes Warm Rooms Feel Cooler
When a radiator runs, it heats the air while also drying it out. That dryness often goes unnoticed but affects your comfort. You might notice a scratchy throat, tight skin, static shocks, or small electrical surprises when touching metal. Dry air subtly changes the way your body perceives temperature, making a warm room feel colder.
 After replacing 90% of his staff with AI, an Indian entrepreneur reveals an unexpected outcome
Your body continuously exchanges heat with surrounding air. In dry conditions, moisture evaporates faster from your skin and breath, pulling heat away and creating a cooling effect—even if the thermometer reads warm. Placing a glass of water near a heater slowly releases moisture into the air through gentle evaporation. This small increase in humidity reduces heat loss from skin and lungs, making the room feel softer, warmer, and more comfortable.
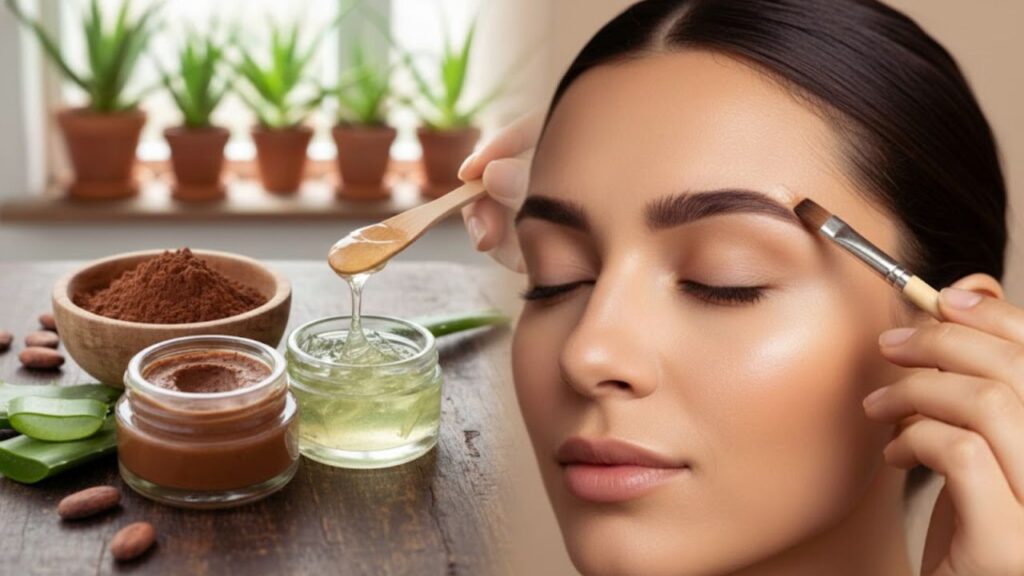
Aloe Vera: Gentle Brow Styling
Aloe vera has soothed skin for centuries. Its cool, light texture makes it ideal for gentle brow styling, offering hold without stiffness. In a homemade gel, aloe acts as a hydrating base, giving light-to-medium control while keeping brows flexible. Choosing high-quality aloe with minimal additives ensures each application nourishes as well as styles.
Cocoa Powder: Natural Tint from Your Kitchen
Cocoa powder provides a rich, earthy brown color perfect for light to medium-dark brows. Mixed into aloe, it creates a soft, stain-like tint rather than a harsh, painted effect. A small pinch adds subtle definition, while a little more deepens the tone. This simple ingredient allows brows to blend seamlessly with natural hairs, offering warmth and nourishment in one.
Preparing Your Simple Brow Gel Kit
Making brow gel at home is a calm, tactile process. A clean jar, a spoon, and a spoolie brush are all you need. At its core, the gel requires just aloe vera gel and cocoa powder. Optional additions like jojoba oil or coffee/charcoal can be added for slip or deeper tones. The charm is in its simplicity: two humble ingredients thoughtfully combined.
– 2 teaspoons pure aloe vera gel (clear, unscented) – Base for natural hold, smooth application, and moisture
– ¼–½ teaspoon unsweetened cocoa powder – Adds soft, natural tint to enhance brow color
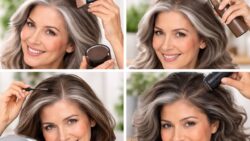 Goodbye Hair Dye for Grey Hair: The Simple Conditioner Add In That Revives Natural Colour Gradually
– Small clean glass jar – Stores the prepared gel safely
– Clean spoolie or angled brush – Applies and shapes brows evenly
– Mini spoon or mixing stick – Blends ingredients smoothly
Mixing the Gel: Simple and Satisfying
Spoon two teaspoons of aloe into a clean jar, add roughly a quarter teaspoon of cocoa powder, and stir slowly to remove clumps. The clear gel gradually transforms into a smooth, earthy brown. Test on the back of your hand, adjusting cocoa for depth or aloe for softness. The texture should be creamy, light enough to spread, yet thick enough to cling to a brush. Let it rest for an hour for even consistency.
Applying Your Brow Gel with Care
Use clean, dry brows and lightly dip a spoolie into the gel, removing excess. Brush through in short, feathered strokes, following natural hair growth. Start at the inner brow and move outward, shaping gently. For extra definition, allow the first layer to dry and add another in sparse areas. An angled brush can mimic individual hairs if needed. The finish stays soft, flexible, and natural.
Embracing Simple, Natural Beauty
Making your own product connects you to a slower, intentional process. It reduces waste, limits unnecessary ingredients, and transforms application into a gentle ritual. Patch testing and small adjustments ensure safety and effectiveness. In that quiet moment—brush in hand, cocoa-scented gel ready—you’re reminded that beauty can be practical, gentle, and personal. Sometimes, it all starts with the simplest ingredients and smallest actions.