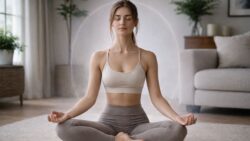
Starting yoga without being naturally flexible can seem scary at first. You might think you won’t do the poses right or that you’ll struggle to keep up with everyone else in class. But here’s the truth: yoga was made for regular people with regular bodies. You don’t need to be flexible before you start yoga. Flexibility comes from practicing yoga regularly. When you begin with easy stretches designed for beginners you allow your body to adjust at its own pace without forcing anything. If you stick with it you’ll notice real changes in how your body moves and feels during normal daily activities. The most important thing to remember is that yoga focuses on getting better over time rather than being perfect right away. Each stretch you do and each breath you take helps improve your movement and makes you feel better overall.
Why Gentle Yoga Is the Safest Starting Point for New Flexibility Gains
# Starting Your Flexibility Journey the Right Way

Beginning with a gentle approach makes sense when you start any flexibility program. Basic yoga stretches help you focus on proper form and body awareness. This method reduces your injury risk and builds a strong foundation for future progress. Simple poses help you develop a better mind-body connection. When movements are straightforward you can pay attention to how your body responds and understand your limits and when to ease up. This awareness builds confidence and motivates you to practice consistently. Research on exercise habits shows that people who start with manageable routines are much more likely to stick with their program. Jumping into difficult workouts too quickly often leads to sore muscles or fatigue or injuries. A gradual approach creates better long-term commitment and stronger results. Learning basic stretches first prepares your muscles and joints and nervous system for more challenging yoga poses later. This makes your practice safer and easier to sustain over time and more enjoyable overall.

11 Beginner-Safe Yoga Stretches That Gradually Unlock Full-Body Flexibility
Beginner Yoga Stretches for Tight Muscles This collection of beginner yoga stretches helps loosen up areas that commonly feel tight. You’ll work on your neck and back along with your hips & hamstrings. The key is to move slowly and breathe steadily while staying comfortable. Don’t worry about how deep you can stretch.
Slow Neck Circles to Release Daily Tension
Neck Circles What it works:This exercise targets your neck muscles and the upper part of your shoulders.
# Head Circles Exercise
To do this exercise you need to move your head in slow smooth circles. Keep your breathing calm and even as you perform the circular motion. Make sure the movements stay gentle & controlled from start to finish.
Why it helps:This stretch releases tightness that builds up from looking at screens and sitting at a desk all day. It also helps your neck move more freely.
Tips for beginners:Make sure you move slowly and stay in control of the motion. Never push your neck beyond what feels comfortable.
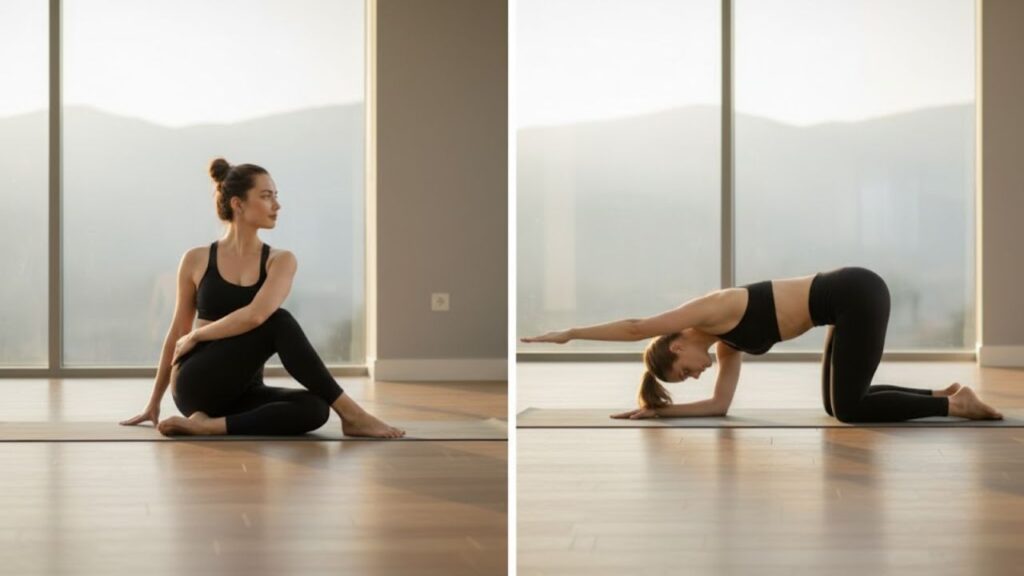
Seated Spinal Twist for a Looser, Healthier Back
Seated Spinal Twist What it works:This exercise targets your spine along with your waist and the oblique muscles on the sides of your torso.
How to perform it: Start by sitting in a comfortable position with your back straight. Slowly turn your upper body toward one side while keeping your hips facing forward. Hold this position briefly and then rotate back to center before repeating the movement on the opposite side.
Regular practice of this twist helps improve how well your spine can move and reduces back stiffness. The movement gently stretches the muscles around your spine and relieves tension that develops when you sit for extended periods.
Advice for beginners: Place your hands on your knees or armrests to provide gentle support during the movement. Only rotate as far as your body allows without forcing the stretch or experiencing discomfort. Your range of motion will naturally increase over time with consistent practice.
Cat–Cow Flow to Wake Up the Spine Gently
Cat-Cow Stretch What It Works: This exercise targets your spine while engaging your core muscles and shoulders.
# How to Perform It
Start by getting down on your hands and knees on the floor. From this base position you will move between two shapes. First round your back upward like a cat that feels threatened. Then reverse the movement by arching your back and letting your belly drop toward the floor. Continue switching between these two positions in a steady rhythm.
Why It Helps: The cat-cow stretch makes your spine more flexible and mobile. It also helps your body relax and release tension that builds up during the day.
Advice for Beginners: Focus on coordinating your breathing with each movement. Inhale during one position and exhale during the other. Make sure you transition slowly between the two shapes rather than jerking or moving too quickly. This controlled approach helps you get better results and prevents strain.
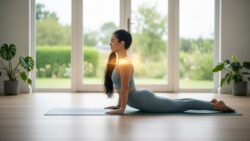
Child’s Pose for Deep Relaxation and Hip Ease
Child’s Pose What it works: This pose targets your lower back along with your hips and shoulders.
How to perform it: Start by sitting back so your bottom rests on your heels. Then stretch your arms out in front of you or place them alongside your body.
# Why it helps
Child’s Pose provides deep relaxation while giving your spine a gentle stretch. This restful position allows your body to release tension naturally. When you fold forward in this pose your back muscles can lengthen and soften without any strain. The gentle compression of your torso against your thighs also encourages deeper breathing which helps calm your nervous system. The pose works by creating space between your vertebrae as your spine rounds forward. This decompression can relieve pressure that builds up from sitting or standing throughout the day. Your lower back especially benefits from this mild elongation since that area often holds the most stress. Also the forward fold position signals to your body that it is safe to rest. This triggers a relaxation response that can lower your heart rate and reduce stress hormones. The combination of physical stretching and mental calming makes Child’s Pose particularly effective for overall wellbeing.
Tip for beginners: Place cushions or a folded blanket under you if you need extra support.
Thread the Needle Stretch to Open Shoulders Safely
# Thread the Needle Stretch Targets: Upper Back Shoulders & Neck
The thread the needle stretch is an effective exercise that focuses on releasing tension in your upper back area while also working the shoulders and neck region. This gentle movement helps improve flexibility and reduces stiffness that often builds up from sitting at a desk or looking down at screens throughout the day. To perform this stretch you start on your hands and knees in a tabletop position. Make sure your wrists are directly under your shoulders and your knees are hip-width apart. Keep your spine in a neutral position and engage your core muscles to maintain stability. Begin the movement by lifting your right arm off the ground and threading it underneath your left arm. Your right shoulder and the side of your head should come to rest on the floor. Your left hand can stay planted on the ground for support or you can extend it forward to deepen the stretch. You should feel a gentle twist through your upper back & a stretch along your right shoulder blade. Hold this position for about twenty to thirty seconds while breathing deeply and steadily. Focus on relaxing into the stretch rather than forcing your body into an uncomfortable position. The goal is to feel a mild tension without any sharp pain. After holding the stretch return to the starting tabletop position by carefully unwinding your right arm. Take a moment to notice how your upper back feels before repeating the movement on the opposite side. Thread your left arm under your right arm and rest your left shoulder and head on the floor. This stretch works particularly well as part of a morning routine or as a break during long periods of sitting. It helps counteract the forward shoulder posture that many people develop from computer work and phone use. Regular practice can lead to improved posture and decreased muscle tension in the upper body. You can modify the intensity of the stretch by adjusting how far you thread your arm underneath your body. A smaller range of motion provides a gentler stretch while reaching further increases the intensity. Listen to your body & work within a comfortable range. The thread the needle stretch also promotes spinal rotation which is important for maintaining back health. This twisting motion helps keep the vertebrae mobile and can reduce stiffness in the thoracic spine. The gentle pressure on the shoulder that rests on the ground provides a massage-like effect on the surrounding muscles. For best results incorporate this stretch into your regular flexibility routine. Performing it several times per week can help maintain the benefits and prevent tension from building up again. Combine it with other upper body stretches for a comprehensive approach to flexibility and muscle health.
How to do it: Start on your hands and knees in a tabletop position. Take one arm and slide it underneath your chest toward the opposite side. Allow your shoulder and the side of your head to gently rest on the floor. Your other hand can stay planted on the ground for support or you can extend it forward. Hold this position while breathing deeply and then switch to the other side.
This stretch works well to release tension that builds up in your shoulders & upper back. It helps your thoracic spine move more easily & reduces the stiffness you get from sitting too long or having bad posture during the day.
Beginner tip: If you feel uncomfortable or your shoulder doesn’t reach the floor easily, place a folded pillow or yoga block under your shoulder for extra support. This modification allows you to ease into the stretch without straining.
Seated Butterfly Pose for Flexible Hips and Inner Thighs
# Targets: This stretch works your glutes & hips
This exercise focuses on the muscles in your buttocks and hip area. When you perform this stretch regularly you can improve flexibility in these important muscle groups. The glutes are among the largest muscles in your body & they play a key role in movement and posture. The hip joints connect your legs to your pelvis & allow for a wide range of motion. Stretching these areas helps reduce tightness that builds up from sitting for long periods or after physical activity. Many people experience tension in their hips and glutes without realizing it until they try targeted stretches. This particular stretch is designed to release that tension and increase your range of motion. You might notice improved comfort when walking or standing after incorporating this into your routine. The stretch also helps prepare your body for more intense exercise by warming up these muscle groups. Athletes often use this type of stretch before running or playing sports. It can also benefit people who work at desks all day since sitting shortens the hip flexors & tightens the glutes. Taking a few minutes to stretch can make a noticeable difference in how your lower body feels. The technique is straightforward and does not require any special equipment. You can do it at home or at the gym as part of your warm-up or cool-down routine. Proper form is important to get the full benefit and avoid strain on other parts of your body.
How to do it: Start by lying flat on your back on a comfortable surface. Bend both knees and keep your feet flat on the ground. Take your right ankle & place it on top of your left knee. Your right knee should point out to the side while your left foot stays planted. You can gently pull your left thigh toward your chest to deepen the stretch. Hold this position for about 30 seconds and then switch sides.
Benefits: This stretch helps reduce tightness in your hips and relieves discomfort in your lower back. It’s especially useful if you sit for long periods during the day or feel stiffness after workouts.
Make sure to keep your raised foot flexed during the entire stretch. This means you should pull your toes back toward your shin. When you keep your foot flexed it protects your knee joint from extra strain. It also helps you get better results from the stretch without risking injury.
Reclined Figure-Four Stretch for Gentle Hip Mobility
# Targets: This stretch works your glutes and hips
This exercise focuses on the muscles in your buttocks and hip area. When you perform this stretch regularly you will notice improved flexibility in your lower body. The glutes are among the largest muscle groups in your body & they need attention to stay healthy and functional. Your hip joints connect your legs to your pelvis & they allow for a wide range of movement. Tight hips can cause discomfort during daily activities like walking or sitting. This stretch helps release tension that builds up from prolonged sitting or physical activity. The gluteal muscles consist of three main parts: the gluteus maximus, gluteus medius and gluteus minimus. Each part plays a role in hip movement and stability. Stretching these muscles can reduce lower back pain and improve your posture. Hip flexibility affects your overall mobility and athletic performance. Athletes often include hip and glute stretches in their warmup routines. Even if you are not an athlete you can benefit from keeping these areas flexible and strong. This particular stretch targets both muscle groups at the same time. You will feel a gentle pull in your outer hip and deep into your glute muscles. Hold the position for at least 20 to 30 seconds to get the full benefit. Regular stretching of your glutes & hips can prevent injuries. It also helps maintain your range of motion as you age. Make this stretch part of your daily routine for best results.
How to do it: Start by lying flat on your back on a comfortable surface. Bend both knees and keep your feet flat on the ground. Take your right ankle and place it on top of your left knee. Your right knee should point out to the side while your left foot stays planted. You can gently pull your left thigh toward your chest to deepen the stretch. Hold this position for about 30 seconds and then switch sides.
Benefits: This stretch helps reduce tightness in your hips and relieves discomfort in your lower back. It works well if you sit for long periods during the day or feel stiffness after workouts.
Make sure you keep your raised foot flexed during the entire stretch. This means you should pull your toes back toward your shin. When you keep your foot flexed it protects your knee joint from extra strain and helps you stretch properly without getting hurt.
Knees-to-Chest Pose to Relax the Lower Back
# Targets: Hips inner thighs, lower back
This exercise focuses on strengthening and stretching the hip area along with the inner thigh muscles and lower back region. When you perform this movement regularly you can expect to see improvements in flexibility & muscle tone throughout these connected areas. The hips are central to many daily activities and athletic movements. By targeting this area you develop better stability and range of motion. The inner thighs often get neglected in standard workout routines but they play an important role in leg strength and balance. Working these muscles helps create more complete lower body development. Your lower back benefits from exercises that engage the hips & thighs because these areas work together as a system. Strengthening the surrounding muscles takes pressure off the spine and reduces the risk of injury. Many people experience lower back discomfort due to weak supporting muscles in the hips and core. This particular exercise addresses all three zones simultaneously which makes it an efficient choice for anyone looking to maximize their training time. The movement pattern encourages proper alignment & teaches your body to move as an integrated unit rather than isolated parts. Regular practice leads to better posture & more controlled movement in everyday situations. You might notice that activities like walking up stairs or getting up from a seated position become easier. The exercise also helps create a foundation for more advanced movements if you decide to progress your fitness routine. The combination of these target areas makes this exercise valuable for both beginners and experienced fitness enthusiasts. You can modify the intensity based on your current fitness level while still getting benefits across all three muscle groups.
# How to do it
Grip the backs of your thighs or hold onto your ankles. Slowly open your hips outward in a controlled motion.
# Benefits
This position helps loosen tight hips and reduces the amount of pressure placed on your spine.
You can hold the back of your knees if reaching your feet feels too difficult when you are just starting out.
Happy Baby Pose for Stress-Free Hip Opening
Seated Forward Bend
This pose targets the hamstrings along with the calves and spine. The position stretches the back of your legs while lengthening the entire spinal column. Your hamstring muscles get a deep stretch as you fold forward. The calf muscles also receive attention during this movement. Your spine extends and releases tension throughout its length. Regular practice of this pose helps improve flexibility in the posterior chain. The hamstrings become more pliable over time. Your calves gain increased range of motion. The spine develops better mobility and alignment. This exercise benefits people who sit for long periods. Tight hamstrings often result from extended sitting. The pose counteracts this tightness effectively. Your lower back also experiences relief from compression. The stretch reaches multiple muscle groups simultaneously. Your body learns to relax into the position gradually. Breathing deeply enhances the stretching effect. The pose creates space between the vertebrae. Athletes find this position particularly useful for recovery. Runners benefit from the hamstring & calf stretch. The spine decompresses after intense training sessions. Flexibility gains translate to better performance. Office workers can use this pose to combat desk posture. The forward fold reverses the effects of slouching. Your hamstrings release accumulated tension. The spine regains its natural curves. Consistent practice yields noticeable improvements. Your hamstrings lengthen & become less prone to injury. The calves develop better elasticity. Your spine maintains healthier positioning throughout daily activities.
How to do it: Start by sitting up straight with good posture. Keep your back long as you fold forward from your hips. Let your upper body move toward your legs while maintaining length through your spine.
Benefits: This stretch helps make your hamstrings more flexible over time. It also has a calming effect on your nervous system and can help you feel more relaxed.
Beginner tip: If you are new to this pose it is okay to keep a bend in your knees. Your main focus should be on keeping your spine long rather than trying to fold deeply. This approach protects your back and helps you build flexibility safely.
Seated Forward Fold to Lengthen the Spine Calmly
# Standing Forward Bend Targets: Hamstrings Back and Shoulders
The standing forward bend is a fundamental yoga pose that primarily works your hamstrings while also engaging your back & shoulders. This simple yet effective stretch helps improve flexibility throughout your posterior chain. When you perform this pose you fold forward from your hips and let gravity assist in deepening the stretch. Your hamstrings receive the most attention as they lengthen along the back of your thighs. The muscles running along your spine also get a gentle stretch that can help release tension built up from sitting or standing for long periods. Your shoulders benefit from this pose as well. When you let your arms hang down or clasp opposite elbows the weight of your upper body creates a natural traction that opens up the shoulder joints. This can feel particularly good if you spend much of your day hunched over a desk or computer. The beauty of the standing forward bend lies in its accessibility. You can modify it to match your current flexibility level by bending your knees slightly or using blocks for support. As your flexibility improves over time you may find yourself able to fold deeper into the pose. Regular practice of this pose can lead to improved posture and reduced lower back discomfort. It also promotes blood flow to your brain which can help you feel more alert and focused. Many people find this pose calming & use it as a way to relieve stress during their day. To get the most benefit from this stretch focus on maintaining length in your spine rather than forcing yourself to touch your toes. The goal is to feel a comfortable stretch without straining. Hold the position for several breaths & allow your body to gradually release into the pose.
# How to Perform a Forward Fold
Start by bending forward from your hips and keep a slight bend in your knees. Allow your arms to hang down freely without creating any tension in your shoulders or hands. As you fold your body forward make sure your head and neck remain loose and relaxed throughout the entire movement. This position helps stretch your hamstrings and lower back while promoting relaxation in your upper body. Focus on breathing steadily as you hold the pose and avoid forcing your body deeper than feels comfortable.
This pose stretches your entire back from your heels all the way to your neck. It releases physical tension and helps calm your nervous system. Many people notice it reduces their mental stress and anxiety levels.
Beginner tip: Allow your body to hang heavy and let gravity pull you deeper into the stretch. Avoid bouncing or forcing yourself down. Stay still & breathe steadily instead.
Clear Signs Your Body Is Ready for Deeper Yoga Poses
After about six to eight weeks of regular practice you might notice that your body is ready for something different. You can hold simple poses without much difficulty. Areas that used to feel tight now move more easily. You practice regularly every week. You pay more attention to how you breathe & position your body. You feel interested rather than nervous about learning new poses. When you reach this point you can try longer practice sessions or beginner flow classes. You can also experiment with small changes to poses you already know. This approach works better than moving directly to advanced yoga.
Creating Lasting Flexibility—One Comfortable Stretch at a Time
Flexibility takes time to develop and there is no way to rush the process. Being consistent and patient with your body will give you better results than trying to force quick progress. These basic yoga stretches help build a solid foundation for better movement and reduced tension over the long term. Continue practicing regularly and remember that each small step contributes to your overall progress.